Have you ever been on the hunt for that one perfect recipe? You know the one. It needs to be easy enough for a weeknight, impressive enough for a party, and delicious enough that everyone asks you for the recipe. It sounds like a tall order, but I promise you, it exists.
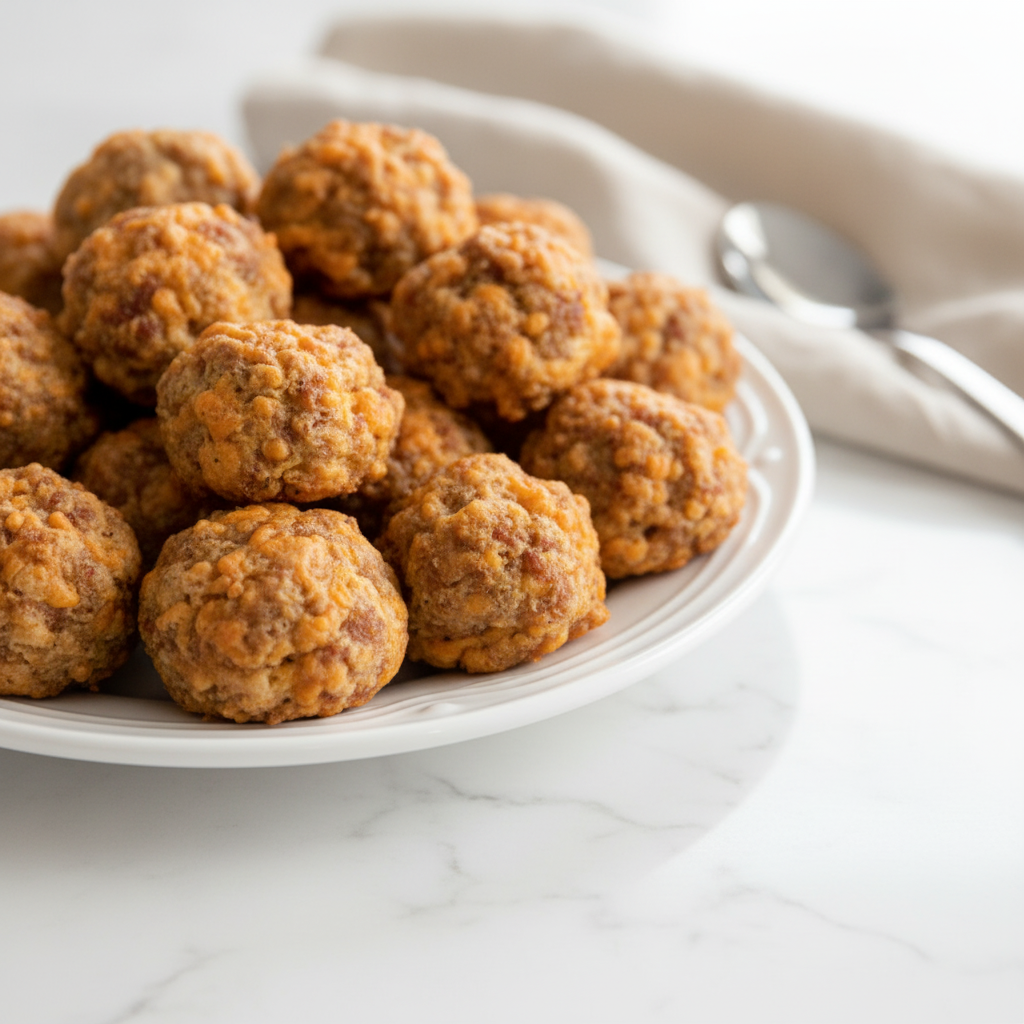
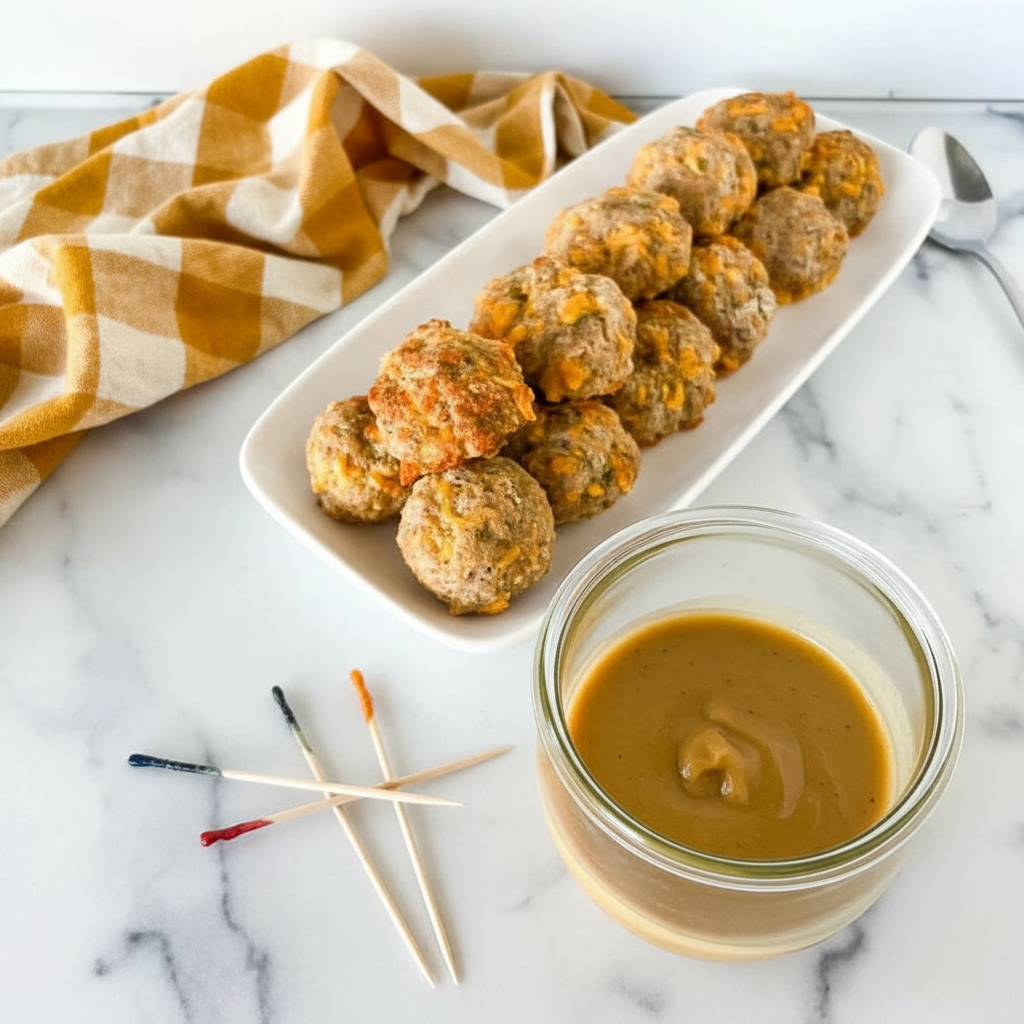
Let me introduce you to these incredible Turkey Sausage Balls with Bisquick. They are cheesy, savory little bites of goodness that come together in a snap. Seriously, they are about to become your new favorite thing to make for just about any occasion.
Jump To:
Why You’ll Love This Recipe
First off, these Turkey Sausage Balls are unbelievably simple to prepare. You do not need any fancy equipment or special skills. If you can mix ingredients in a bowl, you can absolutely nail this recipe on your first try.
The flavor is just out of this world. We use seasoned turkey sausage, sharp cheddar cheese, and a little bit of parmesan for a savory punch. But the real secret weapon here is the cream cheese. It makes these sausage balls so wonderfully moist and tender.
Another great thing is how versatile they are. Serve them up as a hot appetizer for game day, a savory addition to a brunch spread, or just as a quick and satisfying snack. They are a total crowd pleaser no matter when you serve them.
By using turkey sausage, we are making a slightly lighter version of the classic pork sausage balls. You get all of that amazing flavor without it feeling too heavy. It is a fantastic swap that no one will even notice, I promise.
And let’s talk about convenience. You can make a big batch of these Breakfast Sausage Balls and freeze them for later. It is a lifesaver for busy mornings or last minute guests. Just pop them in the oven and you have a warm, homemade treat ready to go.
Ingredients
Okay, let’s get everything together. The ingredient list is short and sweet, filled with simple things you can find at any grocery store. No wild goose chases required for these tasty Turkey Sausage Balls with Bisquick.
- 1 pound ground turkey sausage (seasoned)
- 2 cups sharp cheddar cheese, freshly shredded
- 2 cups Bisquick baking mix
- 4 ounces cream cheese, softened
- ½ cup grated parmesan cheese
- Optional: ½ cup sliced green onion tops
A little note on the ingredients. For the turkey sausage, you can buy it pre seasoned or get plain ground turkey and season it yourself. A little salt, pepper, paprika, garlic powder, and sage will do the trick nicely.
When it comes to the cheese, I really recommend shredding your own. The pre shredded kind has anti caking agents that prevent it from melting as smoothly. Freshly grated cheese makes a huge difference in the texture of your sausage balls.
Bisquick is obviously a key player here, but if you do not have any on hand, do not worry. You can make a quick substitute. Just mix 2 cups of all purpose flour with 1 tablespoon of baking powder, 1 teaspoon of salt, and 2 tablespoons of vegetable oil or butter until it gets crumbly.
And that softened cream cheese? Please do not skip it. It is what keeps these Turkey Sausage Balls from being dry. It adds a lovely richness and a tender texture that is just perfect.
Step By Step Instructions
Ready to make some magic? Following these steps will give you perfect, golden brown Turkey Sausage Balls with Bisquick every single time. Let’s walk through it together.
Step 1: Preheat And Prep
First things first, get your oven preheating to 375 degrees Fahrenheit. While it is warming up, grab a large baking sheet. I like to line mine with parchment paper for the easiest cleanup ever. Nothing sticks, and you can just slide it off when you are done.
Step 2: Combine The Main Ingredients
In a large mixing bowl, it is time to combine the stars of the show. Add your ground turkey sausage, the freshly shredded cheddar cheese, the grated parmesan, and the softened cream cheese. Make sure your cream cheese is truly at room temperature. It will make mixing so much easier.
Step 3: Add The Bisquick
Now, pour the Bisquick baking mix right into the bowl. If you are using green onions, toss those in now too. They add a nice, fresh little kick. Now for the fun part. It is time to mix everything together.
Honestly, the best tool for this job is your hands. Just get in there and squish everything together until it is all evenly combined. If you are not a fan of using your hands, a sturdy stand mixer with a paddle attachment or even a potato masher can work well.
Step 4: Shape The Sausage Balls
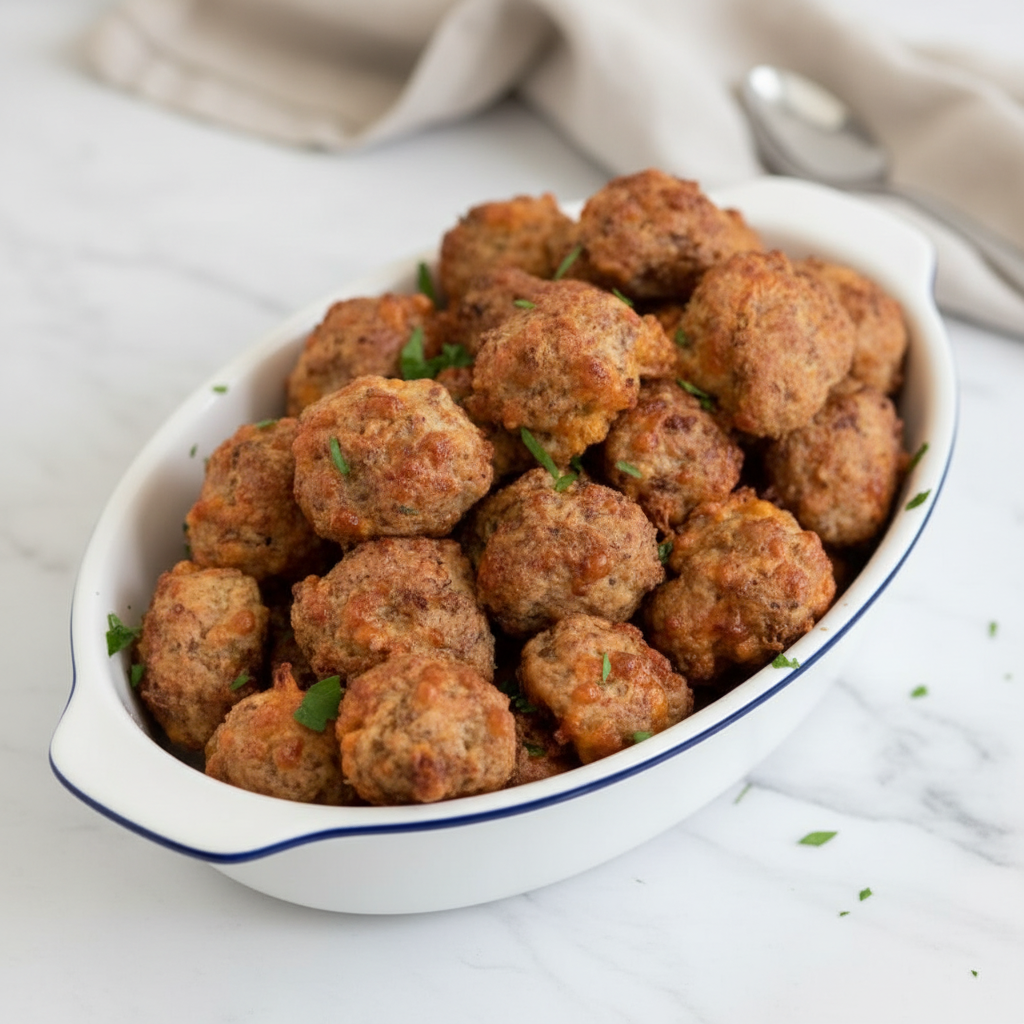
Once your mixture is ready, it is time to form the sausage balls. I aim for balls about the size of a golf ball. A small cookie scoop is a fantastic tool for this, as it keeps them all uniform in size, which helps them bake evenly. You should get about 24 balls from this recipe.
Arrange the balls on your prepared baking sheet. Give them a little space so they are not touching. This allows the heat to circulate around each one, giving you that lovely golden brown exterior all the way around.
Step 5: Bake To Golden Perfection
Pop the baking sheet into your preheated oven. Let them bake for about 15 to 20 minutes. You are looking for them to be beautifully golden brown and cooked all the way through. The cheese will be bubbly and the aroma will be amazing.
The safest way to check for doneness is with an instant read thermometer. The internal temperature of the Turkey Sausage Balls should be 165 degrees Fahrenheit. Once they are there, take them out and serve them warm with your favorite dipping sauce.
The Air Fryer Method
If you love your air fryer, you will be happy to know these Breakfast Sausage Balls turn out great in it. They get extra crispy on the outside which is a huge plus. First, preheat your air fryer to 350 degrees Fahrenheit.
Prepare and shape the sausage balls just like you would for the oven. Place them in the air fryer basket in a single layer, being careful not to overcrowd it. You will likely need to cook them in batches.
Air fry for 10 to 15 minutes, giving the basket a good shake about halfway through the cooking time. This helps them cook evenly on all sides. Again, check that the internal temperature reaches 165 degrees Fahrenheit before serving.
How To Store Leftovers
If you happen to have any leftovers, storing them is super easy. First, let the Turkey Sausage Balls cool down completely to room temperature. This is an important step to prevent them from getting soggy.
Once cooled, place them in an airtight container and store them in the refrigerator. They will stay fresh and delicious for up to four days. To reheat, you can pop them in the oven or air fryer for a few minutes until they are warmed through and crispy again.
These also freeze beautifully. You can freeze them either baked or unbaked. To freeze baked sausage balls, let them cool completely, then arrange them on a baking sheet and freeze until solid. Transfer them to a freezer safe bag or container. They will last for up to three months.
To freeze them unbaked, shape the balls and place them on a parchment lined baking sheet. Freeze until solid, then transfer to a freezer bag. You can bake them directly from frozen, just add about 5 to 10 minutes to the baking time.
Tips
Want to make sure your Turkey Sausage Balls with Bisquick are the best they can be? Here are a few little tips and tricks I have learned along the way. They make a small difference that adds up to a big result.
Be careful not to overmix the dough once you add the Bisquick. Just mix until everything is combined. Overmixing can develop the gluten in the baking mix, which can make your sausage balls a bit tough instead of tender.
As I mentioned earlier, shredding your own cheese is a game changer. It melts so much better and gives you a much creamier texture. It only takes a few extra minutes and is totally worth the effort.
Feel free to get creative with the flavors. A pinch of red pepper flakes can add a nice bit of heat. Some cumin could give it a smoky depth. You can customize these to suit your personal taste perfectly.
Do not forget the dipping sauces. While these Breakfast Sausage Balls are amazing on their own, a good sauce takes them to the next level. Marinara, barbecue sauce, honey mustard, or a simple garlic aioli are all fantastic choices.
Conclusion
So there you have it. A simple, delicious, and incredibly versatile recipe for Turkey Sausage Balls with Bisquick. They are the perfect little bites for any occasion, from a casual family breakfast to a festive holiday party.
I really hope you give this recipe a try. It is one of those keepers that you will find yourself coming back to again and again. Enjoy every savory, cheesy bite.
FAQ
Can I Use A Different Type Of Sausage?
Absolutely. While this recipe calls for turkey sausage, it is very adaptable. Classic pork sausage works wonderfully and will give you a more traditional flavor. You could also use chicken sausage if you prefer.
Just be mindful of the seasoning. If you use a sausage that is already heavily seasoned, you might not need to add any extra. If you use plain ground meat, be sure to add your own spices to ensure the sausage balls are flavorful.
Why Are My Sausage Balls Dry?
Dry sausage balls can be a real bummer, but it is usually an easy fix. The most common culprit is overbaking. Keep a close eye on them and pull them out of the oven as soon as they reach 165 degrees Fahrenheit internally.
Another reason could be the sausage itself. If you use an extremely lean turkey sausage, there might not be enough fat to keep them moist. The cream cheese in this recipe is specifically included to combat dryness, so make sure you do not reduce the amount.
Can I Make These Gluten Free?
Yes, you certainly can. Making these Turkey Sausage Balls gluten free is as simple as swapping out the regular Bisquick for a gluten free baking mix. There are several great options available in most grocery stores these days, including a gluten free version of Bisquick itself.
The rest of the ingredients are naturally gluten free, but it is always a good idea to double check the labels on your sausage and cheeses just to be safe, especially if you are serving someone with a severe sensitivity.
How Do I Keep The Balls From Getting Greasy?
Using turkey sausage already gives you a head start on avoiding greasy sausage balls. However, if you are using pork sausage or just want to be extra careful, there are a couple of things you can do.
First, make sure to use a baking sheet with a rim. After baking, you can gently tilt the pan to let any excess grease pool in a corner. Transfer the cooked sausage balls to a plate lined with paper towels or a wire rack to let any remaining grease drip away before serving.
Can I Prepare The Mixture In Advance?
Yes, this is a great recipe to prep ahead of time. You can mix all the ingredients together, cover the bowl tightly with plastic wrap, and store it in the refrigerator for up to 24 hours. When you are ready to bake, just shape the balls and proceed with the recipe as written. It is a perfect time saver for parties.
Easy Turkey Sausage Balls
These easy Turkey Sausage Balls with Bisquick are savory, cheesy bites perfect for any occasion. Made with cream cheese for a wonderfully moist and tender texture, they’re a simple, crowd-pleasing appetizer or breakfast treat.
Ingredients
Instructions
- Preheat your oven to 375°F and line a large baking sheet with parchment paper for easy cleanup.
- In a large mixing bowl, combine the ground turkey sausage, shredded cheddar cheese, grated parmesan, and softened cream cheese.
- Add the Bisquick baking mix and sliced green onions (if using). Use your hands or a sturdy mixer to combine all ingredients until they are evenly incorporated.
- Shape the mixture into 1-inch balls (about the size of a golf ball) and arrange them on the prepared baking sheet, leaving a little space between each one.
- Bake for 15-20 minutes, or until golden brown and cooked through. The internal temperature should reach 165°F.
- Serve warm with your favorite dipping sauce.
Notes
Air Fryer Method: Preheat air fryer to 350°F. Cook in a single layer for 10-15 minutes, shaking halfway, until the internal temperature reaches 165°F.
Cheese Tip: For the best texture, shred your own cheese. Pre-shredded cheese contains anti-caking agents that can affect melting.
Variations: Add a pinch of red pepper flakes for some heat or cumin for a smoky flavor.
Serving Suggestion: These are delicious with marinara, barbecue sauce, or honey mustard for dipping.
Nutrition
Calories
Sugar
Fat
Carbs