Have you ever found yourself staring into the freezer late at night, wishing for a scoop of rich, creamy ice cream? I know I have. But then the feeling of wanting something healthy kicks in. It’s a classic dilemma, right? What if I told you that you could have both? A delicious, satisfying frozen dessert that’s also packed with protein.
That’s where this incredible Creami Ninja Recipe comes into play. It is a fantastic way to enjoy a cookies and cream treat without any of the usual guilt. Using the amazing ninja creami machine, we can turn a few simple ingredients into a scoopable, dreamy dessert that feels like a total indulgence. Get ready to meet your new favorite sweet snack.
Jump To:
Why You’ll Love This Recipe
Honestly, there are so many reasons to adore this Creami Ninja Recipe. First off, it’s incredibly simple to make. We are talking about a few minutes of prep time before you pop it into the freezer. There is no complicated churning or fancy techniques involved. It is truly for everyone.
Another great thing is the texture. The ninja creami works its magic to create an unbelievably smooth and creamy consistency. It’s not icy or chunky like some homemade ice creams can be. This one tastes like it came straight from a premium ice cream shop. You get that authentic mouthfeel we all crave.
Plus, this is a fantastic Protein Ice Cream. With a full serving of protein powder in the mix, it’s a dessert that actually helps you meet your fitness goals. It is a wonderful way to refuel after a workout or just add a little extra protein to your day in the most delicious way possible.
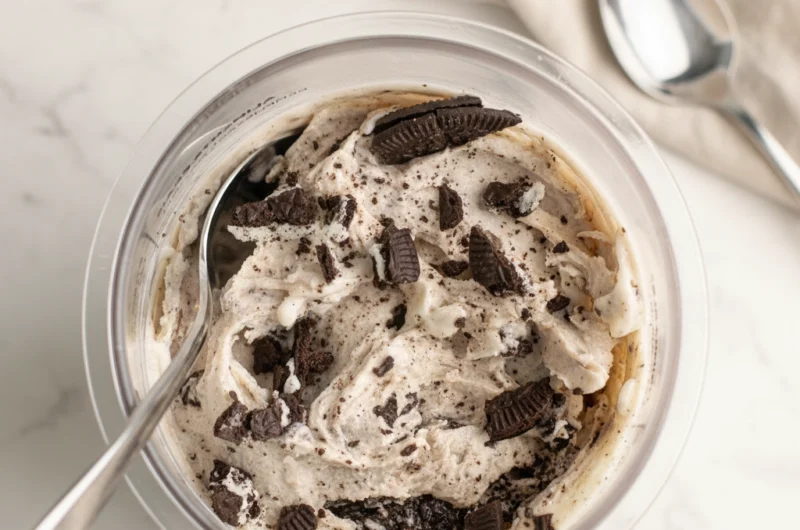
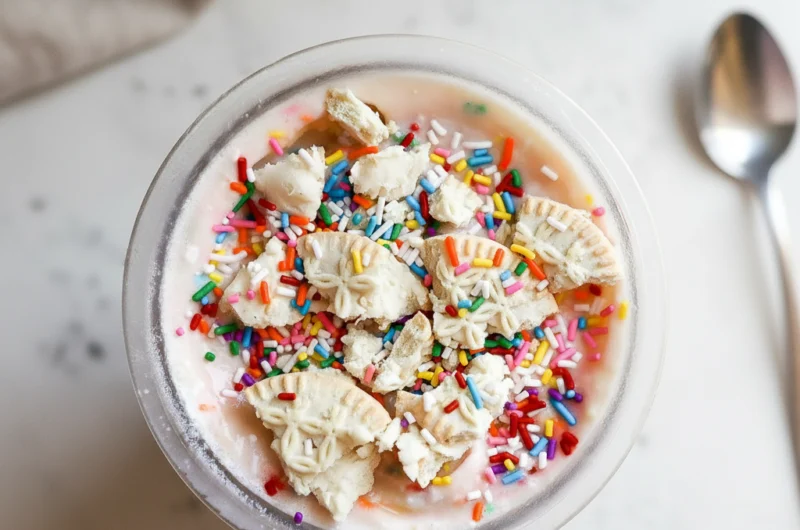
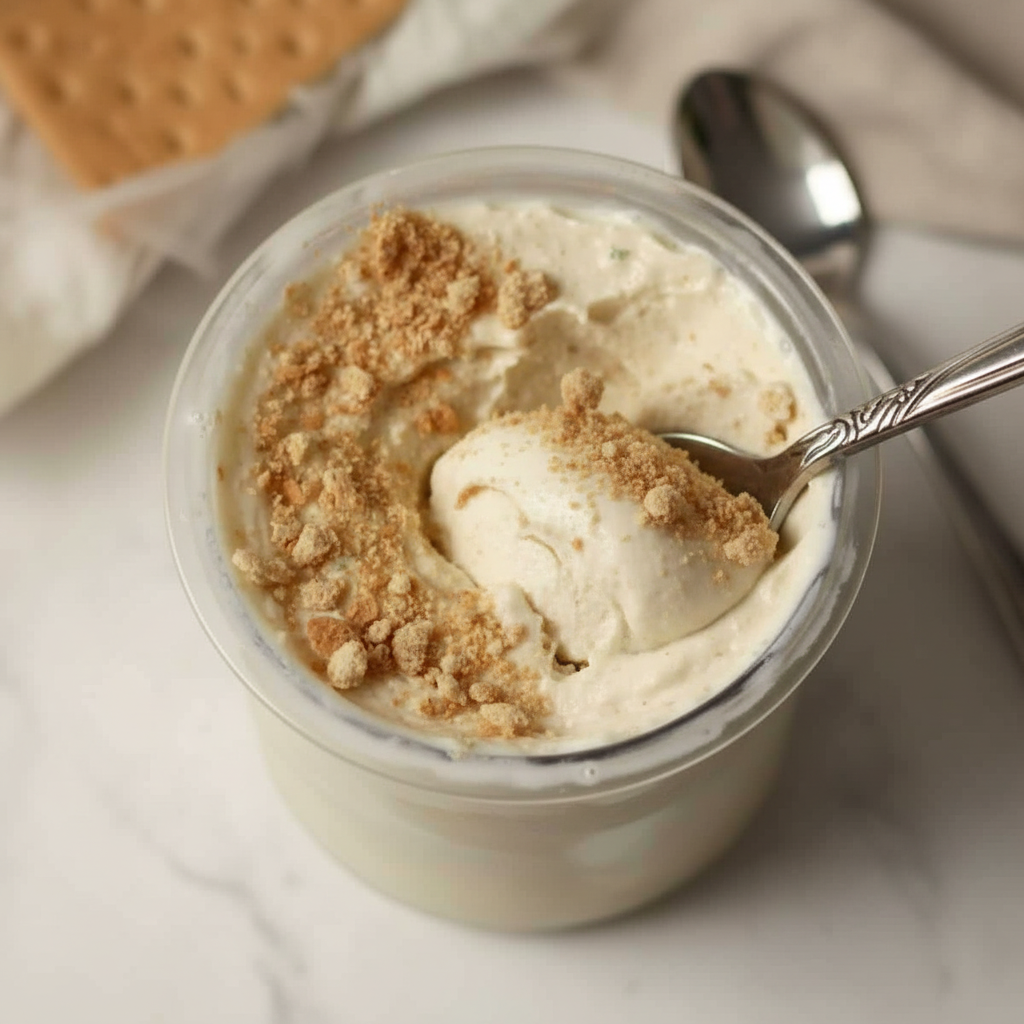
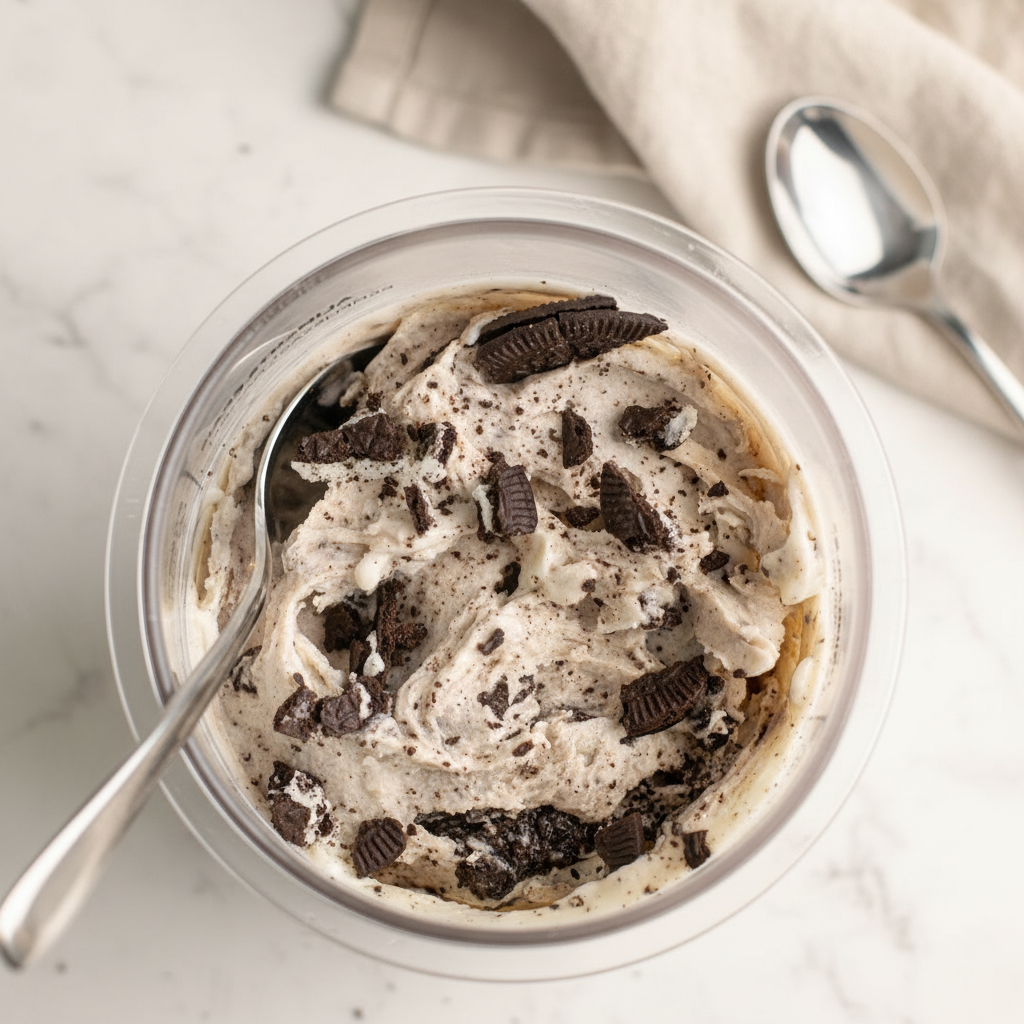
And let’s not forget the flavor. The combination of sweet vanilla and chocolatey Oreo thins is a classic for a reason. It is comforting, familiar, and absolutely delightful. You get those lovely chunks of cookie swirled into every single bite. It is pure happiness in a pint.
Finally, this recipe is super customizable. You can easily switch things up to fit your dietary needs or preferences. Want to make it dairy free? Go for it. Need a gluten free version? Simple swap. This recipe is a wonderful base for all your creative ideas.
Ingredients
You only need a handful of simple ingredients for this fantastic Creami Ninja Recipe. Let’s take a look at what you will need to gather.
- 1 ½ cup skim milk
- 1 serving vanilla whey protein powder (about 35g)
- 2 teaspoon vanilla extract
- 4 Oreo thins
Let’s talk a little about these ingredients. For the milk, skim works wonderfully and keeps things light. However, if you are looking for an even creamier texture, using 2% milk is a fantastic option. It adds just a bit more fat, which translates to a richer final product.
When it comes to the protein powder, a good quality vanilla whey protein is my first choice. The brand you use will affect the final protein count and the overall sweetness. Feel free to use your favorite. Just make sure it’s a flavor that you genuinely enjoy on its own.
Don’t skip the vanilla extract. It might seem like a small amount, but it really boosts the vanilla flavor and makes the base taste much more like traditional ice cream. It is a small detail that makes a big difference in the final taste of your Protein Ice Cream.
And for the star of the show, the Oreo thins. I like using the thins because they break up nicely and give you a good cookie to ice cream ratio without being overwhelming. They provide that classic cookies and cream crunch and flavor we all know and love.
Step By Step Instructions
Making this recipe is so rewarding. Just follow these simple steps and you will be on your way to enjoying a delicious homemade Protein Ice Cream.
Step 1: Create And Freeze The Base
First things first, grab your Ninja Creami pint container. Pour the milk directly into it. Then, add your serving of vanilla protein powder and the vanilla extract. Now, it is time to mix everything together. I recommend using a small whisk or a milk frother for this.
You want to make sure the protein powder is completely dissolved. Scrape the sides and bottom to ensure there are no hidden clumps. The mixture should be smooth and uniform. Once it is all mixed, secure the lid on the pint and place it in the freezer. Make sure it is on a level surface. Let it freeze for at least 24 hours.
Step 2: The First Spin
After waiting patiently for your base to freeze solid, it is time for the magic. Take the pint out of the freezer. Sometimes the sides can get a little extra frosty, so I like to run the pint under warm water for about 30 seconds. Then, be sure to dry it off completely.
Place the pint into the outer bowl of your ninja creami machine. Lock the lid in place and secure the whole assembly onto the machine base. Select the “Lite Ice Cream” function and press the button. The machine will be loud, but that is just the sound of deliciousness being made. Let it run through the full cycle.
Step 3: The Re spin For Creaminess
Once the first spin is done, take a look at the texture. Often, with high protein bases, it might look a little crumbly or powdery. Do not worry. This is completely normal. This is where the re spin comes in. Add one or two tablespoons of extra milk to the center of the pint.
Place it back on the machine and press the “Re-spin” button. This second spin with the added liquid will transform that powdery texture into a wonderfully smooth and creamy consistency. It should look just like soft serve ice cream. This is a key step for the best Creami Ninja Recipe texture.
Step 4: Add The Magic Mix Ins
Now for the fun part. Take your four Oreo thins and break them into small pieces. Use a spoon to create a small hole, about an inch wide, down the center of your ice cream base. Drop the cookie pieces into that hole. Try to get them all the way down.
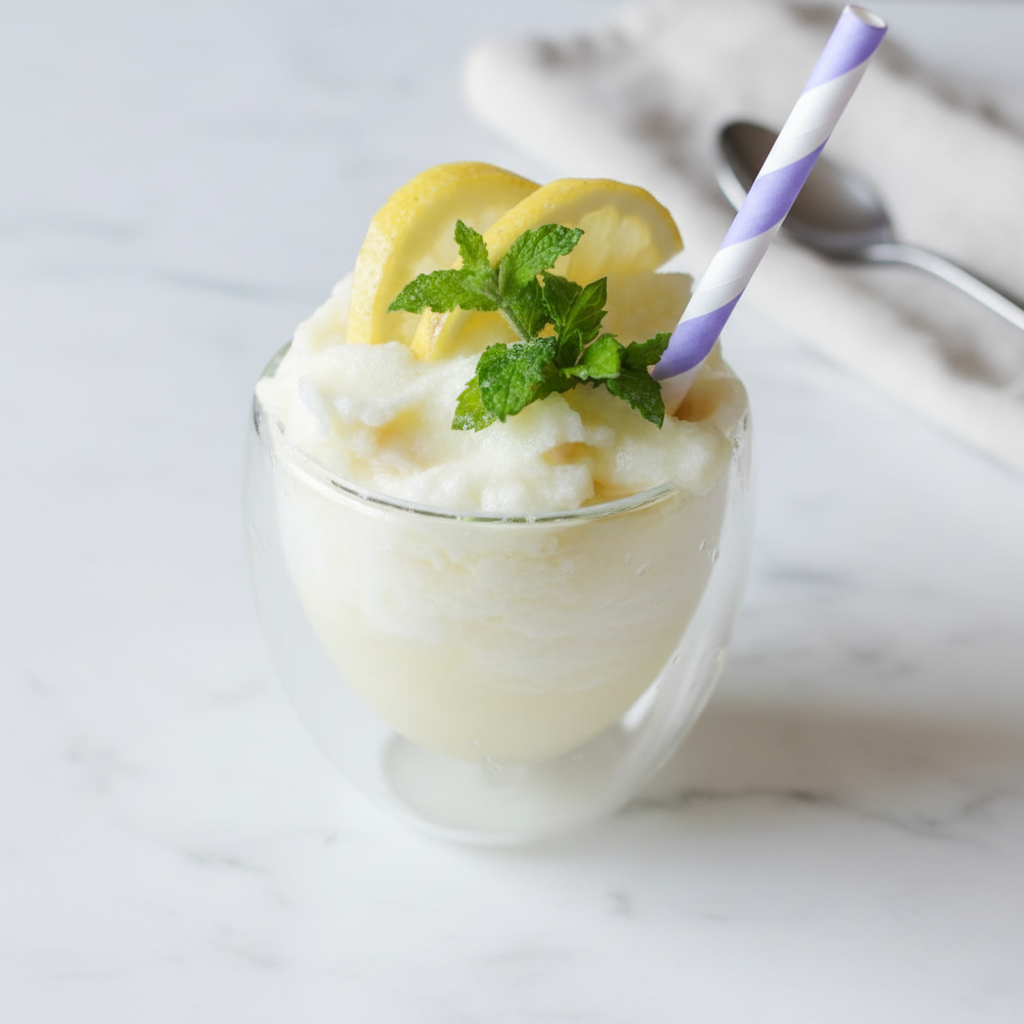
Put the pint back onto the machine one last time. This time, select the “Mix In” function. The machine will gently churn the Oreo pieces throughout the pint, creating that beautiful cookies and cream swirl you see in the photos. Once the cycle is finished, your Protein Ice Cream is ready to enjoy immediately.
How To Store Leftovers
This recipe makes a generous portion. You might find you have some left over. If that happens, storing it properly is key to enjoying it again later. Do not just pop the pint back in the freezer as is. You will want to take a moment to prepare it for its next spin.
Take a spoon and carefully flatten the top surface of the remaining ice cream. You want to create a smooth, level top. This helps prevent large ice crystals from forming and makes it easier for the ninja creami to process it again later. Once it is level, put the lid back on and return it to the freezer.
When you are ready for another serving, simply take the pint out and place it back in the machine. You will likely need to run it on the “Lite Ice Cream” setting again to bring it back to that creamy texture. Keep in mind that the Oreos will be fully blended into the base this time, creating a gray colored cookies and cream flavor throughout rather than distinct chunks.
Tips
Here are a few extra tips to make sure your Creami Ninja Recipe experience is a success. First, be patient with the freezing time. A full 24 hours is really important to ensure the base is frozen solid. A partially frozen base will not process correctly and will result in a soupy texture.
If your base is consistently powdery even after a re spin, try adding a tiny bit more liquid. Sometimes different protein powders absorb liquid differently. Just add milk one tablespoon at a time until you reach your desired creaminess. A little goes a long way here.
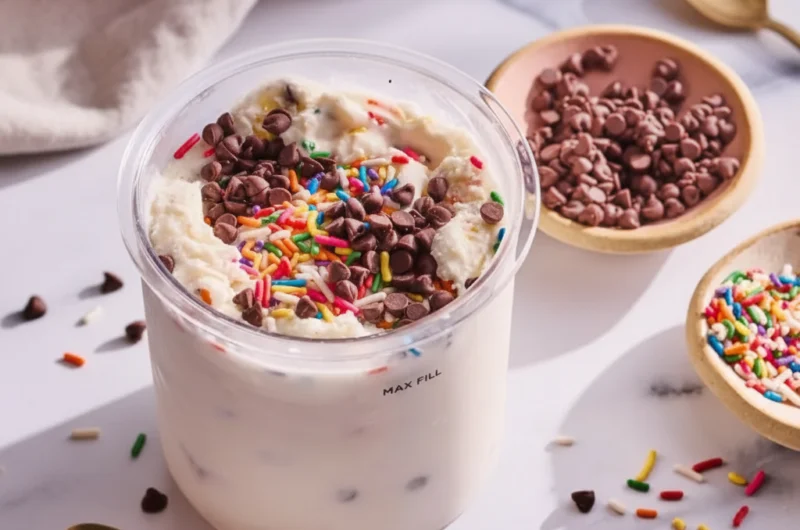
Feel free to get creative with your mix ins. While Oreo thins are a classic, you could try chocolate chips, chopped nuts, or even a swirl of peanut butter. The “Mix In” function is designed to handle all sorts of goodies, so have fun experimenting with your own combinations.
Also, make sure your pint is on a very level surface in your freezer. If it freezes at an angle, the machine might have trouble processing it evenly. This can sometimes trigger an error light on the machine, so a level freeze is a simple way to avoid any trouble.
Conclusion
And there you have it. A simple, delicious, and satisfying Creami Ninja Recipe that brings the joy of cookies and cream ice cream right to your kitchen. It is the perfect way to enjoy a sweet treat that aligns with a healthier lifestyle. You get all the flavor and creamy texture without any of the compromise.
This Protein Ice Cream is more than just a recipe. It is a fun way to get creative and make something truly special. The ninja creami opens up a world of possibilities for homemade frozen desserts. I hope you love this recipe as much as I do. Happy churning.
FAQ
Can I Make This Recipe Dairy Free?
Yes, you absolutely can. To make this dairy free, simply use a plant based milk like almond milk or oat milk. You will also need to use a plant based vanilla protein powder. The results will be just as delicious and creamy.
Can I Use A Different Kind Of Cookie?
Of course. If you need a gluten free option, there are many great gluten free chocolate sandwich cookies on the market that would work perfectly. You could also try other cookies like chocolate chip or shortbread for a different flavor profile.
What If My Ice Cream Is Powdery?
A powdery texture after the first spin is very common with a Protein Ice Cream. This is why the re spin step is so important. Adding a tablespoon or two of extra milk and running the “Re-spin” cycle should make it smooth and creamy.
How Many Servings Does This Recipe Make?
This recipe can be enjoyed as one large, satisfying serving for a single person, especially as a post workout snack. It can also be split between two people for a lighter, healthy dessert portion. It all depends on your appetite.
Ninja Creami Cookies and Cream Protein Ice Cream
A simple and delicious recipe for a creamy, high-protein cookies and cream ice cream made in the Ninja Creami. A satisfying treat that fits a healthy lifestyle.
Ingredients
Instructions
- Pour the skim milk into the Ninja Creami pint container. Add the vanilla protein powder and vanilla extract.
- Using a small whisk or milk frother, mix until the protein powder is completely dissolved and the mixture is smooth.
- Secure the lid on the pint and place it on a level surface in the freezer for at least 24 hours until frozen solid.
- Remove the frozen pint from the freezer. Place it into the outer bowl of the Ninja Creami machine, lock the lid, and secure it on the base.
- Select the ‘Lite Ice Cream’ function and let it run through the full cycle.
- If the texture is powdery, add 1-2 tablespoons of milk to the center. Place it back in the machine and press the ‘Re-spin’ button.
- Create a hole down the center of the ice cream. Break the Oreo thins into small pieces and add them to the hole.
- Place the pint back onto the machine and select the ‘Mix In’ function. Once the cycle is complete, serve and enjoy immediately.
Notes
For the creamiest result, ensure the base is frozen for a full 24 hours on a very level surface in your freezer.
If the ice cream is still powdery after the first re-spin, add one more tablespoon of milk and re-spin again.
Feel free to substitute Oreo thins with other mix-ins like chocolate chips, chopped nuts, or different cookies.
Nutrition
Calories
Sugar
Fat
Carbs