Have you ever found yourself staring into the freezer, wishing for a scoop of delicious ice cream but not the sugar crash that comes with it? I know I have. That’s where the magic of homemade frozen treats comes in, and honestly, it has completely changed my dessert game. If you’re looking for amazing Ninja Creami Recipes, you have come to the right place.
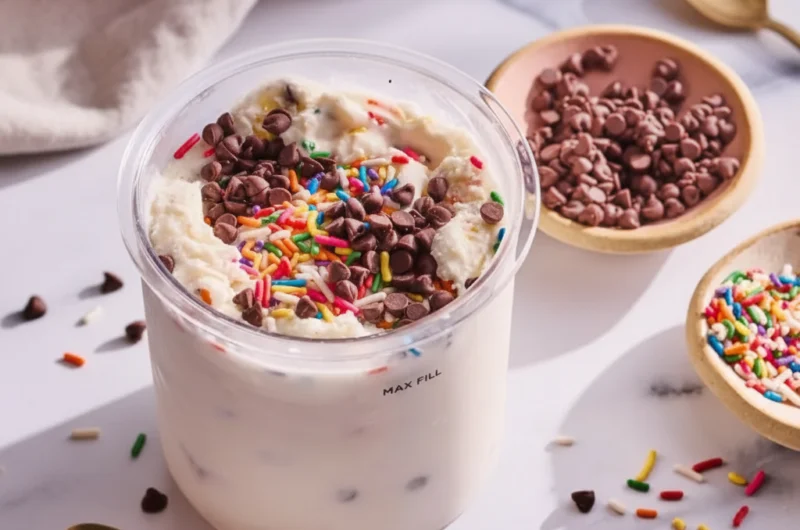
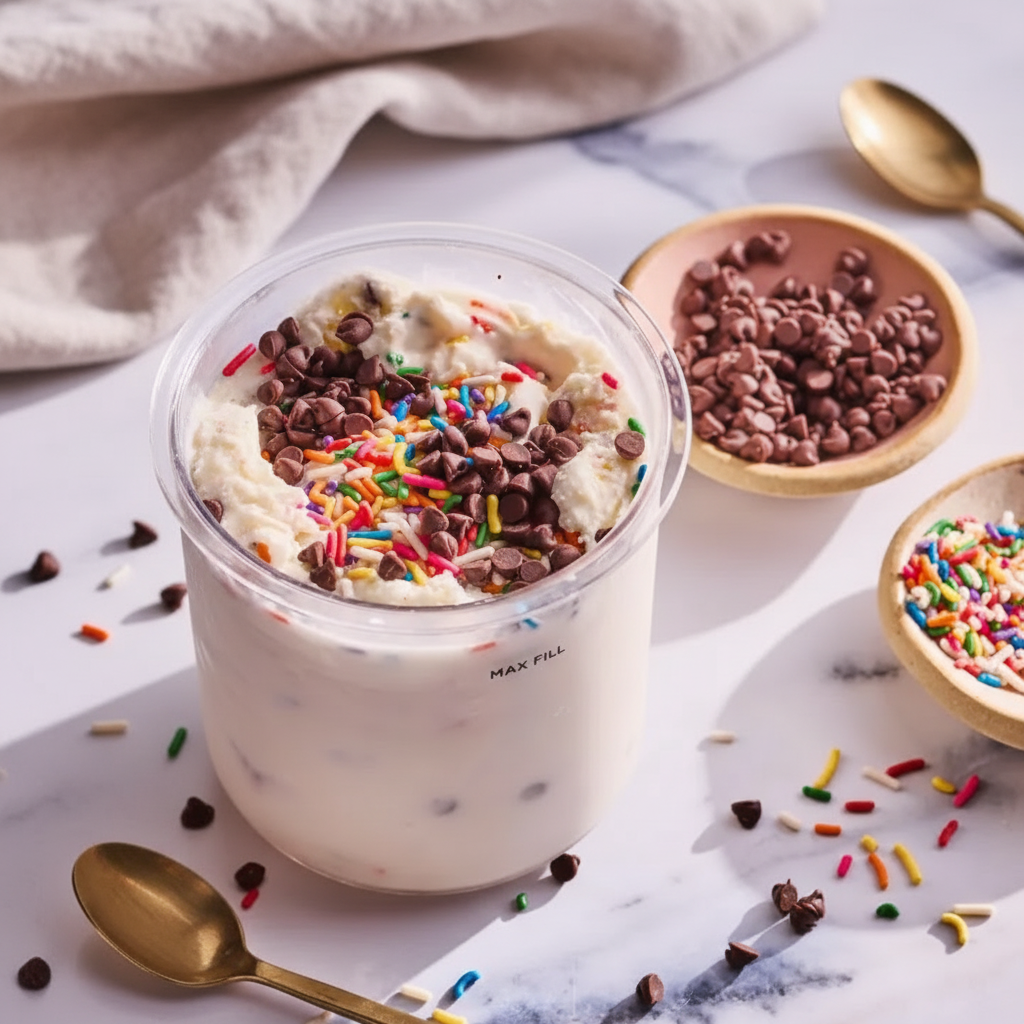
Today, we are making a celebratory flavor that feels like a party in a bowl. Get ready for a fantastic birthday cake Protein Ice Cream. It’s creamy, packed with flavor, and surprisingly good for you. Let’s dive in and make something wonderful together.
Jump To:
Why You’ll Love This Recipe
First off, the flavor is just pure fun. It genuinely tastes like a slice of birthday cake, but in a cold, creamy form. The combination of vanilla and a hint of almond with colorful rainbow sprinkles is a classic for a reason. It brings a smile to your face.
This is also one of those fantastic Ninja Ice Cream Recipes Healthy eaters will adore. We are packing it with protein, making it a satisfying snack that can curb your sweet tooth without throwing off your nutrition goals for the day. It is a treat you can feel good about eating.
The texture is another huge win. Thanks to the Ninja Creami, you get a super smooth and creamy consistency that rivals any store bought ice cream. There are no ice crystals here, just pure, silky goodness. It’s one of the best parts about making Ninja Creami Recipes at home.
Plus, it’s so easy to make. You just mix a few ingredients, freeze the base, and let the machine do the hard work. It’s a wonderful recipe for anyone new to making their own ice cream or for those who just want something quick and reliable.
Ingredients
The ingredient list for this is short and sweet. You likely have a few of these items in your pantry already. Here’s what you’ll need to create this tasty Protein Ice Cream.
- 1 cup Fairlife 2% milk
- 1 cup unsweetened almond milk
- 1 scoop Birthday Cake protein powder
- 1 tbsp sugar free vanilla jello pudding mix
- ⅛ tsp almond extract
- Rainbow sprinkles
A quick note on the milk. Fairlife is great because it is ultra filtered, which means it’s higher in protein and lower in sugar. This helps create a creamier base for our Ninja Creami Recipes.
Step By Step Instructions
Ready to get started? Making these Ninja Creami Ice Cream Recipes High Protein Low Cal is a breeze. Just follow along with these simple steps.
Step 1: Combine Your Ingredients
First things first, grab your Ninja Creami pint container. Pour in the Fairlife milk and the unsweetened almond milk. Then add your scoop of birthday cake protein powder. Don’t forget the sugar free vanilla pudding mix and the tiny splash of almond extract. The almond extract really brings that cake batter flavor to life.
Now, grab a handheld frother or a small whisk. You want to mix everything together really well until it’s completely smooth. Make sure there are no clumps of protein powder or pudding mix left. A smooth base is the key to creamy ice cream.
Step 2: Time To Freeze
Once your mixture is smooth, put the lid on the pint container and place it in the freezer. Make sure it’s on a flat surface so it freezes evenly. For the best results, you’ll want to let it freeze for a full 24 hours. This ensures the base is frozen solid all the way through, which is crucial for the perfect texture in Ninja Creami Recipes.
Step 3: The First Spin
After 24 hours, it’s time for the magic. Take the pint out of the freezer. The base might have a small hump in the middle, which is totally normal. Before putting it in the machine, it can be helpful to run the outside of the pint under hot water for about 60 to 90 seconds. This helps loosen it just a tiny bit from the sides.
Now, place the pint into the outer bowl, attach the lid with the blade, and lock it into your Ninja Creami machine. Select the Lite Ice Cream button and let it run through the cycle. It’s going to be loud, but that’s the sound of deliciousness being made.
Step 4: Check The Texture
Once the first spin is done, take the pint out and check the texture. Sometimes, it comes out looking a bit powdery or crumbly. Don’t worry, this is a very common occurrence with Ninja Creami Recipes, especially with low fat bases. If it looks like this, your next step is simple.
Just put the pint right back into the machine and press the Re-Spin button. This second spin usually does the trick, transforming the powdery mix into a smooth and creamy Protein Ice Cream. If it’s still not quite there after a re-spin, add a tablespoon of milk and hit Re-Spin one more time. That almost always solves it.
Step 5: Add The Mix Ins
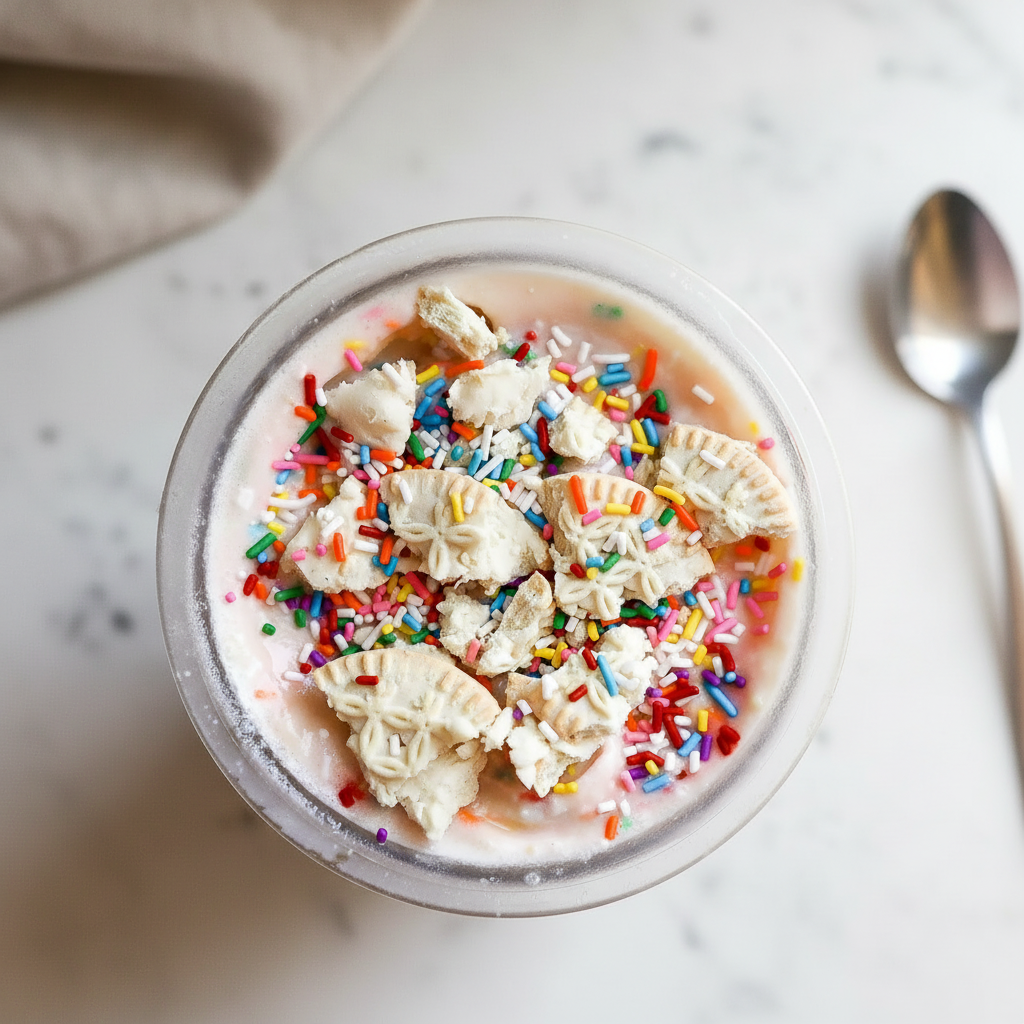
Now for the fun part. Once your ice cream is silky smooth, use a spoon to dig a small hole in the center, about an inch wide, all the way to the bottom. This is where you’ll add your rainbow sprinkles. Be as generous as you like.
Place the pint back into the machine and press the Mix In button. The machine will run a final, quick cycle to evenly distribute the sprinkles throughout your birthday cake creation. And that’s it. Your homemade, healthy ice cream is ready to enjoy. Grab a spoon and dig in.
How To Store Leftovers
If you have any leftovers, which is sometimes a big if, storing them is easy. Just smooth the top of the ice cream in the pint container, put the lid back on, and pop it back into the freezer. Make sure it’s on a level surface.
When you’re ready for another scoop, it will be frozen solid again. You can’t just scoop it out like regular ice cream. You’ll need to put it back in the Ninja Creami and run it on the Re-Spin cycle to bring it back to that perfectly creamy texture. This is a normal part of enjoying your homemade Ninja Ice Cream Recipes Healthy style.
Tips
Want to make your Ninja Creami Recipes even better? Here are a few tips I’ve learned along the way. First, feel free to swap the milk. You can use Fairlife skim milk if you want to lower the fat content even more. Just remember that a higher fat content generally leads to a richer and creamier result.
What if you’re feeling impatient? While waiting 24 hours is best, you can sometimes get away with freezing for 12 to 16 hours. If you go this route, I recommend skipping the Re-Spin button. After the Lite Ice Cream cycle, go straight to the Mix In cycle. This helps prevent the ice cream from getting too soft, since the base isn’t fully solidified.
My biggest tip is about the powdery texture. Always try the Re-Spin button first before adding more liquid. Nine times out of ten, that’s all it needs to become perfectly smooth. Adding liquid too early can sometimes result in a soupy texture, and nobody wants that. Trust the process and let the machine work its magic.
Finally, don’t be afraid to experiment. This birthday cake recipe is just a starting point. The world of Ninja Creami Recipes is vast. You can try different protein powder flavors, extracts, or mix ins to create your own unique combinations.
Conclusion
And there you have it. A simple, delicious, and healthy way to satisfy your ice cream cravings. This birthday cake Protein Ice Cream is proof that you don’t have to choose between a treat and your health goals. With a little prep and a fantastic machine, you can have it all.
I hope you love this recipe as much as I do. It’s one of my favorite Ninja Creami Recipes to make when I want something special. Give it a try, and let me know what you think. Happy ice cream making.
FAQ
Can I Use A Different Protein Powder?
Absolutely. You can use any flavor of protein powder you enjoy. Vanilla or cake batter flavors work best for this specific recipe, but chocolate or strawberry would also be delicious. Just keep in mind that different brands and types of protein, like whey, casein, or plant based, can affect the final texture.
Why Is My Ice Cream Icy?
An icy texture usually means there isn’t enough fat, protein, or sugar to keep the ice crystals small. The sugar free pudding mix in this recipe acts as a binder and stabilizer to help prevent that. Make sure your base is mixed very well and frozen completely solid before spinning.
Do I Have To Use The Jello Pudding Mix?
It is highly recommended for the best texture. The pudding mix contains emulsifiers that give the Protein Ice Cream a smoother, creamier mouthfeel and prevent it from being too icy. You can leave it out, but the final product might not be as rich.
Is This Recipe Good For Meal Prep?
Yes, it’s wonderful for meal prep. You can mix up several pints at once and store them in the freezer. That way, you have a quick and easy treat ready to spin whenever you want one. It is a great way to enjoy Ninja Creami Ice Cream Recipes High Protein Low Cal all week long.
Ninja Creami Birthday Cake Protein Ice Cream
This homemade birthday cake protein ice cream is a fantastic treat made right in your Ninja Creami. It’s creamy, packed with flavor, full of colorful sprinkles, and surprisingly healthy.
Ingredients
Instructions
- In a Ninja Creami pint container, combine the Fairlife milk, unsweetened almond milk, birthday cake protein powder, sugar-free pudding mix, and almond extract.
- Using a handheld frother or a small whisk, mix all ingredients thoroughly until the mixture is completely smooth and no clumps remain.
- Secure the lid on the pint container and place it on a flat surface in the freezer. Freeze for at least 24 hours until it’s frozen solid.
- Once frozen, remove the pint from the freezer. Place the pint into the outer bowl, attach the blade lid, and lock it into your Ninja Creami machine.
- Select the ‘Lite Ice Cream’ button and let the machine run its cycle.
- After the first spin, check the texture. If it appears powdery or crumbly, place the pint back into the machine and press the ‘Re-Spin’ button. This usually creates a smooth, creamy texture.
- Once the ice cream is smooth, use a spoon to create a hole in the center. Add your desired amount of rainbow sprinkles.
- Place the pint back into the machine and press the ‘Mix In’ button to evenly distribute the sprinkles throughout the ice cream. Serve and enjoy!
Notes
Always try the Re-Spin function first to fix a powdery texture before adding more liquid, as this is often all that’s needed.
Feel free to experiment with different protein powder flavors like vanilla or strawberry for a new twist.
For best results, ensure the base is frozen completely solid (minimum 24 hours). An insufficiently frozen base can result in a soft or soupy texture.
Nutrition
Calories
Sugar
Fat
Carbs